Intro: The Pattern Vault keeps every pattern you own in one place, along with the instruction booklet, photos of the envelope, and notes on what fabric it needs. Here is how to add one.
1. Open the Pattern Vault
Choose Pattern Vault from the menu and add a new pattern.
2. Name it
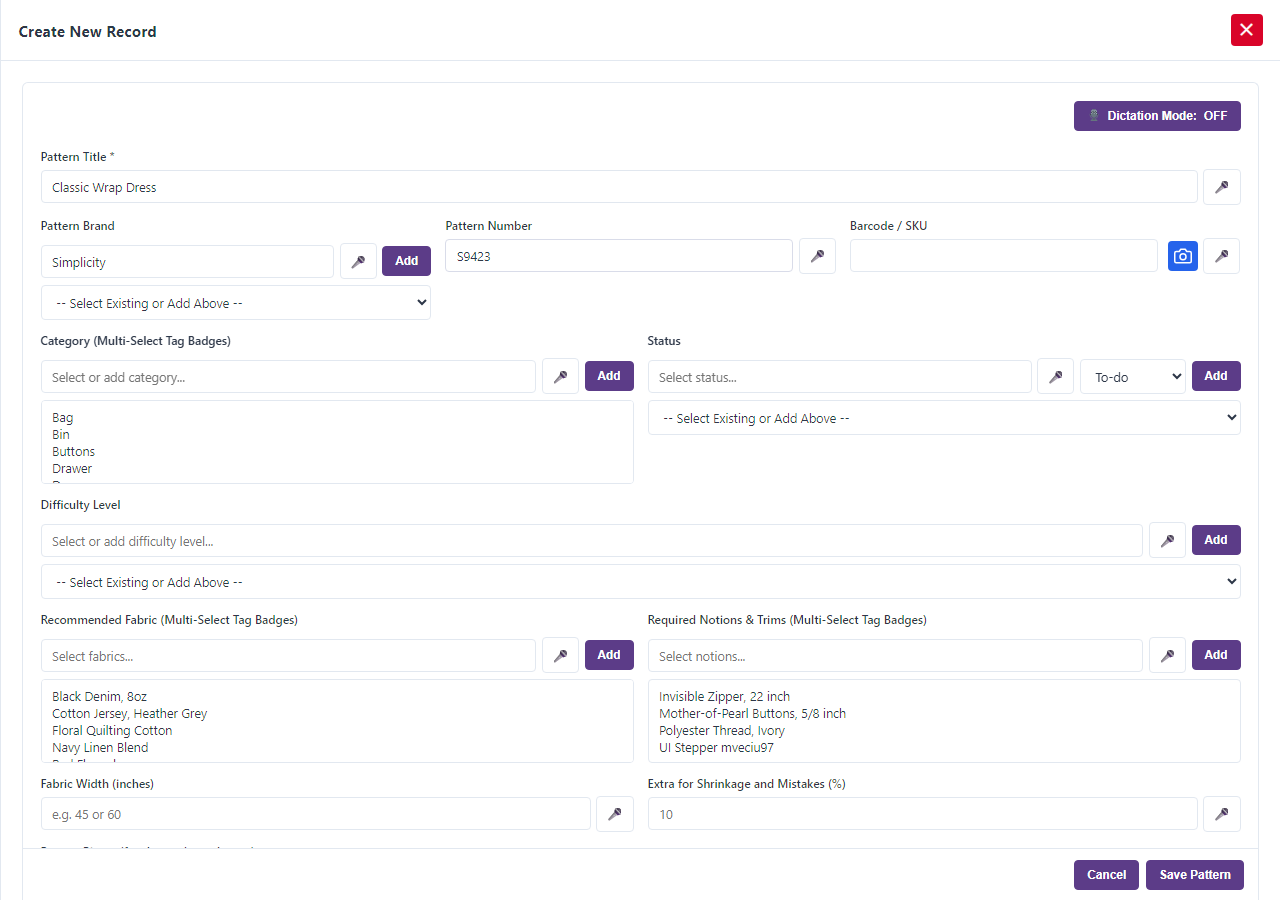
Enter the Pattern Title, the Pattern Brand and the Pattern Number. If the envelope has a barcode, tap the camera button next to Barcode / SKU and scan it.
3. Describe it
Choose a Category and a Status. Set the Difficulty Level, the Size Range (for example 6-18 or XS-XL) and the Format / Source, such as Printed, PDF or Projector.
4. Note the stretch
If the pattern is for knits, enter the Required Stretch (%). When you link a fabric with less stretch than the pattern needs, the app gives you a Stretch Advisory. You can still go ahead.
5. Link fabric and notions
Pick the Recommended Fabric and the Required Notions & Trims. These show up when you plan a project.
6. Record where you got it
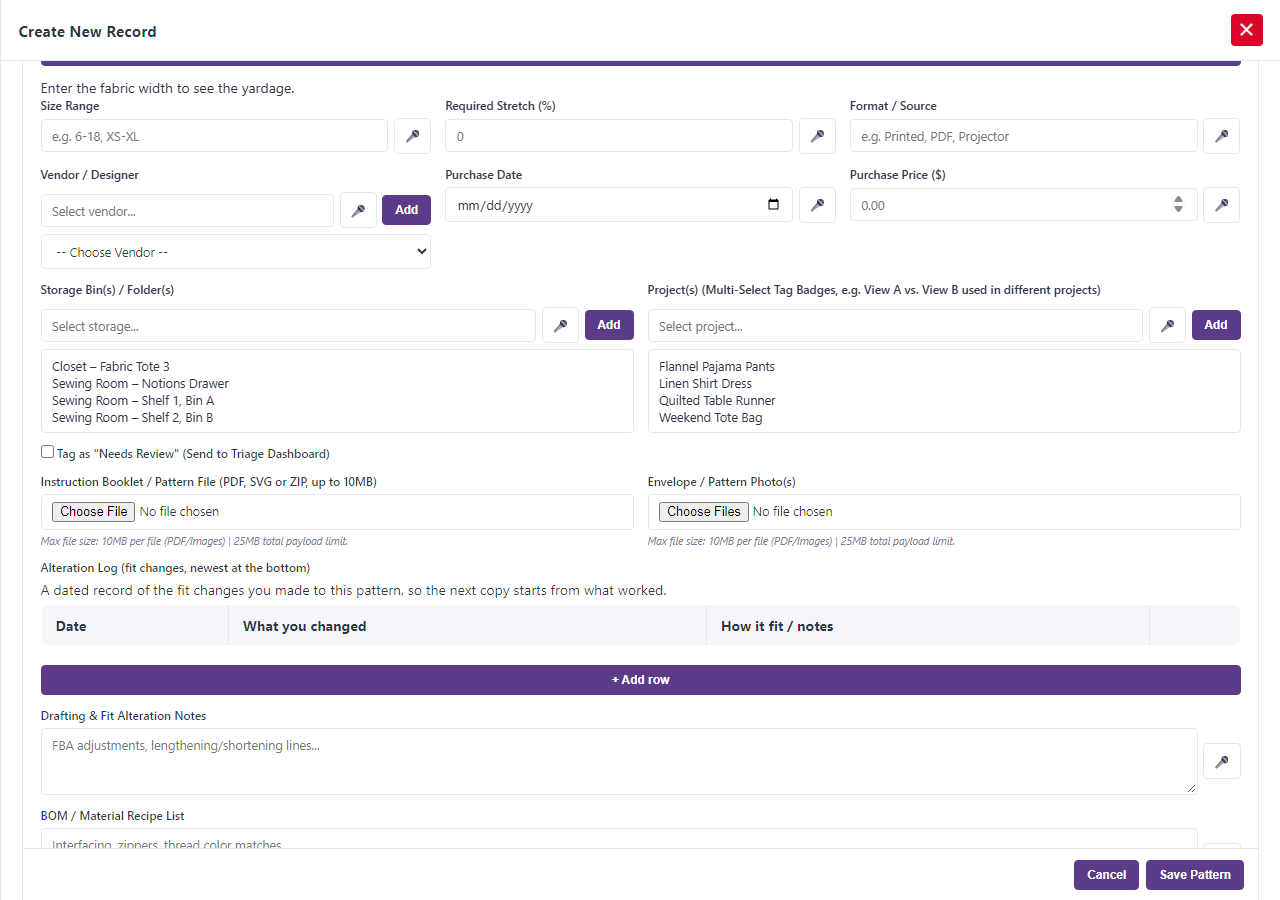
Add the Vendor / Designer, the Purchase Date and the Purchase Price. This stops you buying the same pattern twice.
7. Upload the files
Use Instruction Booklet PDF File to upload the PDF. Use Envelope / Pattern Photo(s) to add pictures of the front and back of the envelope.
8. Say where the paper copy lives
Choose the Storage Bin(s) / Folder(s) where the paper pattern is kept. Link the Projects you used it for, and note which view you made.
9. Save
Select Save. If you are short on time, check the Needs Review box and finish later from your Triage Queue.
One more thing: Sewing Project Manager at Frozen Arctic Apps keeps your paper and PDF patterns together, so you stop buying the same one twice.