
Intro: Good fit starts with good measurements. In Sewing Project Manager, a measurement profile holds 26 body measurements for you, a family member or a client, so you can measure once and use the numbers on every project.
1. Open Measurements
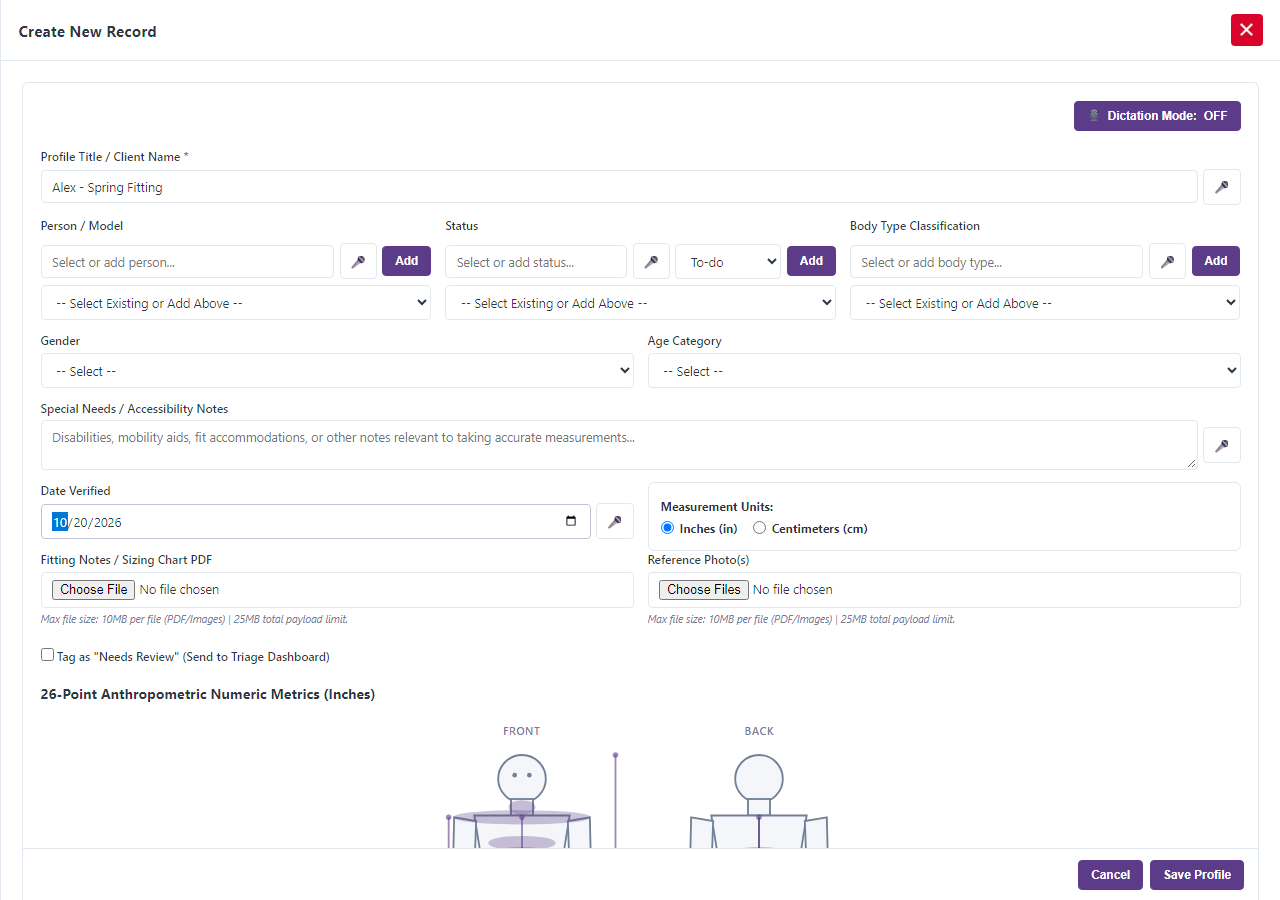
Choose Measurements from the menu and add a new profile.
2. Name the profile
Enter the Profile Title / Client Name. Choose the Person / Model, a Status, and the Body Type Classification. Pick the Gender and the Age Category: Baby, Toddler, Child, Teen or Adult. Enter the Date Verified so you know how recent the measurements are.
3. Choose your units
Pick inches or centimeters with Measurement Units. The app converts the values for you.
4. Take the 26 measurements
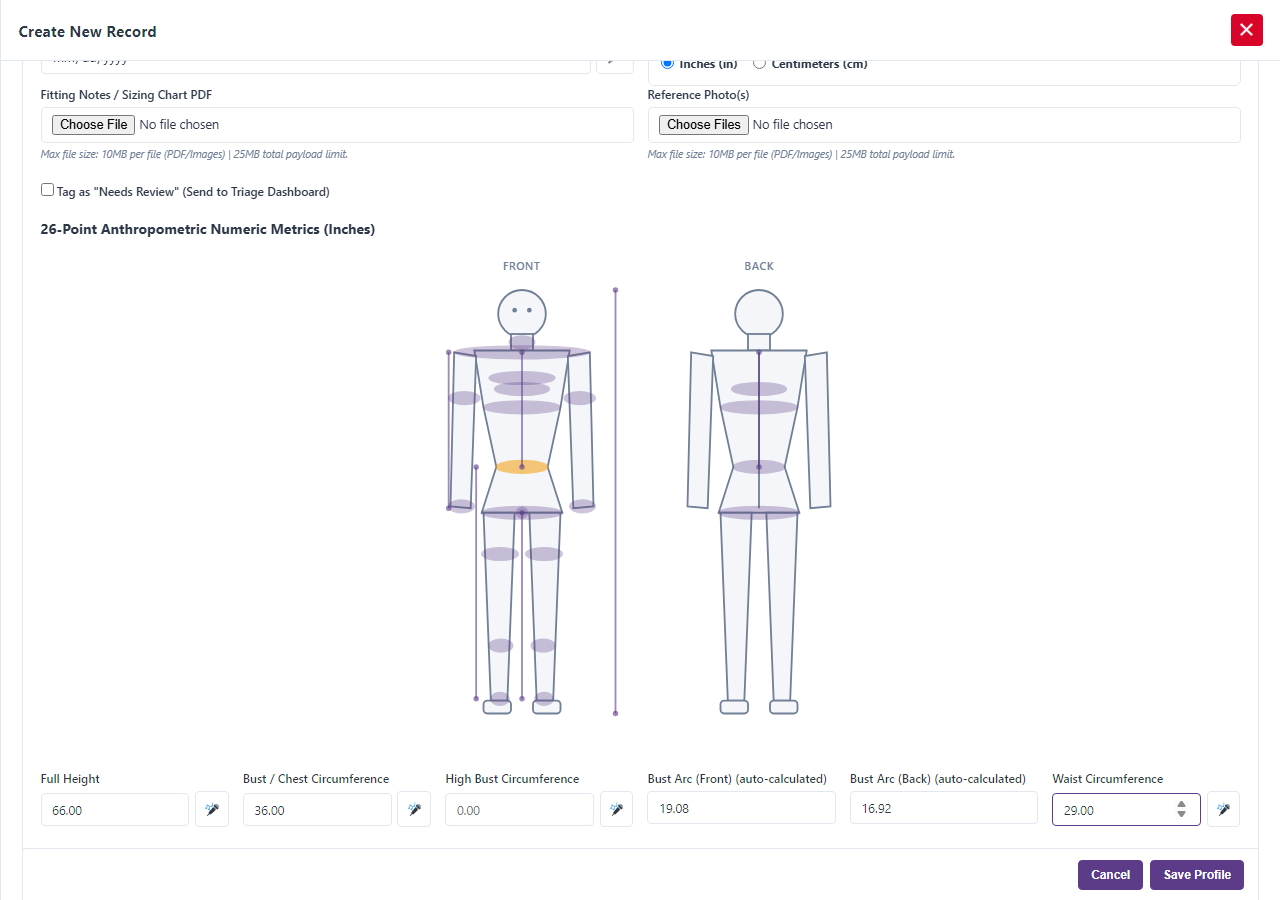
The profile has a field for each of these:
- Full Height
- Bust / Chest Circumference
- High Bust Circumference
- Bust Arc (Front) and Bust Arc (Back)
- Waist Circumference
- Waist Arc (Front) and Waist Arc (Back)
- Full Hip Circumference
- Hip Arc (Front) and Hip Arc (Back)
- Inseam Length
- Outseam Length
- Shoulder Width
- Sleeve Length
- Bicep Circumference
- Wrist Circumference
- Neck Circumference
- Front Waist Length
- Back Waist Length
- Cross Front Width
- Cross Back Width
- Thigh Circumference
- Calf Circumference
- Ankle Circumference
- Crotch Depth / Seated Rise
The front and back arc fields are marked auto-calculated and are worked out for you from the bust, waist and hip, so you only need to fill them in when you have measured them yourself.
5. Say the numbers
Tap the microphone beside a field and speak the number. Fractions such as “two and a half” become 2.5. This is useful when you are holding a tape measure and have no free hands.
6. See where it is on the body
The profile shows a body outline that highlights the measurement you are working on, so you know exactly where to put the tape.
7. Add photos and notes
Add Reference Photo(s) or a Fitting Notes / Sizing Chart PDF if you like, and use Special Needs / Accessibility Notes for anything that affects fit. Select Save Profile when you are done.
8. Use the profile
Link the profile to a project so the measurements travel with it. Update the Date Verified whenever you re-measure.
One more thing: Sewing Project Manager at Frozen Arctic Apps keeps a measurement profile for everyone you sew for, so fitting is faster every time.